Tuesday, August 31, 2010

Farm Fresh - From Berries to Muffins

Two weeks ago, I had the opportunity to visit my friend's cute little farm out in Watsonville. Daniel and I got to ride a tractor, feed chickens, collect fresh eggs and pick blackberries off a bush! It's not your average sized bush either, it was a giant with many many berries ready for the picking. I had all these ideas running through my head - what will I make with all of these berries? We picked about 2 pounds worth and I finally had the chance to make some things - creme brulee and muffins. Yum yum :). I don't know what the berries tasted like before I put them into the mix but I'll say they are excellent ingredient for your every day dessert.

I also want to add that I now understand why blackberries (or any kind of berry) are so expensive in the market. I was poked by thorns left and right while picking these berries; there definitely isn't a way to mechanize this method of picking berries because it would only ruin the ripe berries. I'm guessing that the berry industry charges high rates because their workers have to work hard to pick all of these. The next time you have a berry, think about it! Also think about the idea of farm to table meals. I went to this awesome restaurant in Napa (Long Meadow Ranch) where they bring all of their home grown ingredients directly to your table in a magnificent dish. I felt like I was doing the same thing by picking these berries and bringing them directly home to eat. Oh how great it feels to know where your food is coming from!

Here are some fun pictures from the berry picking extravaganza:

Oh look how they hang

Colorful pink to brown colored eggs Yee-haw it's tractor riding!

My friend made a delicious Japanese donburi dish with eggs, mushrooms and onions over chicken katsu with the fresh eggs. I'm glad we didn't have to worry about consuming these eggs. All they eat are some corn seeds and fruit and they have plenty of room to move around and be clean and safe.

So on to the recipe. Thanks to Joy the Baker for posting a great recipe for muffins.

Blackberry Muffins - Yields about 8 small sized muffins

Ingredients:
- 3 Tbsp of unsalted butter
- 1/6 cup of milk - I used 1% low fat milk
- 1 large egg
- 1/2 tspn of vanilla extract
- 3/4 cup of all-purpose flour
- 3/8 cup of sugar ( I mixed half white and brown sugar) - The measurements are weird because I cut everything in half but for you to imagine, it's half of 3/4 of a cup.
- 1/2 tspn of baking powder
- Pinch of salt
- 3/4 cup of berries - black, blue or red. Your choice.

Directions:
- Place your oven rack in the upper third part of your oven and preheat it to 375 degrees.
- Prepare your muffin pan with liners or spray it with canola oil.
- Melt the butter in the microwave for about 20-30 seconds. Make sure that it's not too hot and then start whisking in the milk, egg and vanilla until it is a milky smooth mixture.
- In another bowl, whisk together flour, sugar, baking powder and salt. Slowly combine the wet mixture into the dry ingredients. Once combined, start folding in the berries.
- Divide the batter evenly among the muffin cups ~ 8. Bake for about 20 minutes on the upper rack.
- After they turn golden brown, take out the muffins and let them cool for 15 minutes. After it has cooled down, remove the muffins from the pan. They should easily come out if you sprayed enough oil.
- Enjoy! They're so great warm :)


I really enjoyed this recipe because it combined something tangy with something bread-y. It's not that sweet and it's perfect as a very light snack. It's also beautiful in color (look at that purplish color!) I can't wait to enjoy this with some milk.

Monday, August 30, 2010

Mmm matcha!

This post is dedicated to green tea - one of the many loves of my life. I love to have tea time in the morning, late afternoon and evenings but this time it's in dessert! I have a list of desserts with tea as an ingredient (like chai tea cupcakes) but this isn't about that. It's about matcha green tea mochi baby cakes with red bean paste (say that ten times fast!). I wanted to make something unique/special because it was Daniel's moms birthday and I wanted him to take home a nice little surprise for his family. At first I didn't think it would be possible to make something with matcha because I wasn't sure where I would get the powder. I read on Happy Home Baking (a great blogger who focuses on some Asian dessert specialties) that you can get the powder on Amazon but there wasn't enough time for it be delivered. If you live next to a Mitsuwa or another Japanese market, you can easily find it there in the tea aisle. It's about $7.00 for a small can that is 1.5 ounces. I can't believe it's that pricey for a small ounce of it but it's definitely worth it. It smells so great when you pop open the can - so fresh! Plus you can get quite a few tablespoons out of a can.

Ok so on to the recipe. Since I only bought matcha and red bean paste (also at the Japanese market), I thought I could make matcha pound cake but I didn't actually have a bread pan. I had to think of something else using these two items as the main ingredients and found Kitchen Meditation (ommm) which came to the rescue. At first I was a little hesitant because she mentioned the ingredient Mochiko which I've used to make mochi before. It was a sticky messy situation and I didn't want to touch it ever again but somehow it made its way back into my life. With only two hours before I had to get going, I decided this recipe would do and the final product did look pretty good. I have to say, the taste was also pretty good ;)

Ingredients for 12 mini (cup) cakes:
- 1 2/3 cup Mochiko
- 1/2 tsp salt
- 1 1/2 tsp baking powder
- 1/2 cup sugar
- 1 tbsp (or more) matcha
- 1/4 cup egg beaters
- 1/3 cup melted butter
- 1 cup soy milk (she used Almond)
- 1 cup Anko (red bean paste) - I just eyeballed the amount I would put into each cake.

Directions:
- Preheat the oven at 350 degrees.
- Melt the butter in the microwave (approximately 30 seconds) then set aside for cooling. I learned that if you don't let the butter cool down and you mix it with the eggs, you create an unsettling scramble affect that is startling. Scary but fixable.
- In one large bowl, mix together the flour, salt, baking powder, matcha and sugar.
- When the butter has colled down, mix it together with the egg and milk in another bowl.
- Slowly stir the wet ingredients into the dry ingredients and mix until it becomes on giant green batch of sticky batter.
- Spray a muffin pan with cooking spray and spoon the batter into each cup at about 1/3 full.
- Scoop about 1 to 1/2 tsp of red bean paste into each cup in the middle of the batter.
- Top the remainder of the batter (about half a tablespoon full) on top of each cup. I shook the pan to make sure that the batter covered up the red bean paste and made each cup look smooth on top.
- Bake for about 25 minutes and as Daniel would say, "Ita daki mas!" which means "I'm ready to eat".

How were they?
I don't usually like the texture of mochi but when it's in a cake like form, it's a little more bearable. I like the subtle green tea taste and the sweet little surprise in the middle. This is an entirely new thing I tried and I must say, I enjoyed it. The cakes aren't soft nor crumbly when bitten but it's lightly chewy and softly dense. Weird way to describe it but it's just a weird kind of (cup)cake. I don't really want to call it a cupcake because it really just reminds me of a brownie bite. Small size without any frosting so I don't think it can really be categorized as a cupcake. But it is refreshing and different. Hope you try it sometime!


Thanks to my awesome sous chef Daniel for being the BEST photographer ever :) and my inspiration for writing in my blog.

Monday, August 16, 2010

Soup de jour - French Onion Soup and an entree that doesn't match


I really should be writing about how my soup cooking journey is going with my new awesome book but I'm feeling a bit like French Onion Soup today. This is one soup that Daniel's been craving and one that we haven't had it in a while (I'm talking years) , so why not try it out? I also got new ramekins which came with my creme brulee set (from Christmas!) so I had to put them to use. Semi-new kitchen gadgets need to be played with more often! Anyway, I had a few onions laying around and bottle of red wine so into the pot they go to make this delish soup.

French Onion Soup I - From Allrecipes.com by Chefbuzz

Ingredients (Warning - This is supposed to make about 4 servings but it filled quite a plenty ramekins):
-2 tbsp of butter
-2 onions (yellow), thinly sliced - warning, one may get teary eyed as a result :)
-1/2 teaspoon granulated sugar
-1 1/2 teaspoons all-purpose flour
-1 1/4 cups of water
-1/4 cup of red wine
-1 can condensed beef broth (10.5 ounces) - This is where I made the mistake. DO NOT buy regular beef broth. It needs to be concentrated.
-1 French baguette (get it fresh from Henrys!)
Slices of white cheese (they recommend Swiss, I bought Provolone)

Directions:
- Melt the butter in a large saucepan. After it has melted, stir in the sugar and let it semi-dissolve. Then add the onions and cook them over medium heat for about 10 minutes or until it gets brown.


- Add flour and stir until it is well blended with the onions and pan juices. Add water, wine and beef broth. Heat the mixture until it is boiling then reduce to low heat. Cover the soup and let it simmer for 10 minutes.


It looks a bit odd but then it'll change into this familiar soup color


- While the soup is simmering, cut the French bread into 1 inch thick slices. Toast the bread at 325 degrees until it starts turning slightly brown ( I love toasted bread!). Keep them in the oven until the soup is ladled into the ramekins.


- When the soup is ready, ladle it into the ramekins and place a slice of bread on top of each bowl. It might not fit (since ramekins are tiny) so just cut the bread in half. Then take a piece of cheese and place it right on top of the bread. Place the soup bowls on a cookie sheet for proper handling.


- Place the bowls into the oven and bake them at 425 degrees for 10 minutes. Once the cheese starts to burn a bit and melt beautifully over your bowl, it's ready! Bon appetite!

###
A été la soupe magnifique? Eh...
While I was hoping that this soup would taste like the one that they have at Mimi's Cafe (they make it so good!), it didn't turn out like it because of the poor choice I made in my beef broth selection. If a recipe says to get something condensed, there must be a reason for it (more sodium!). :) I think the best part of the soup, sadly, was the toasted bread with yummy cheese! While I didn't enjoy the soup so much because it lacked a bit of saltiness and because my stomach was overwhelmed with onions, Daniel really enjoyed it (or so he said..). Haha. He actually ate two whole ramekins and slurped up every bit of it! :) Lesson learned: Next time I'll add more sodium and get condensed beef brother instead of the all organic, better-for-your-health broth. ;)

And on to the entree that I made that has no relevance at all to French Onion Soup. Since soup was not going to be enough for dinner, I decided to look up another recipe - allrecipes.com is so great - and found Sweet and Spicy Stir Fry with Chicken and Broccoli. YUM! I haven't actually followed a recipe for an Asian dish but this one looked super easy, I had all the ingredients and it looks healthy! SCORE!

Ingredients
- 3 cups of chopped broccoli
- 1 tbsp of olive oil
- 2 skinless, boneless chicken breast halves cut into 1 inch strips
- 1/4 cup sliced green onions (or more)
- 4 cloves of garlic, thinly sliced
- 1 tbsp of hoisin sauce (aka plum sauce)
- 1 tbsp chile paste (I just used the chili pepper flake paste)
- 1 tbsp low sodium soy sauce
- 1/2 tspn ground ginger
- 1/4 tspn crushed red pepper (Thank you Pizza Hut for giving me this...)
- 1/2 tspn salt
- 1/2 tspn black pepper (or to your taste)
- 1/8 cup of chicken stock

Directions:
- Steam the broccoli until it is tender but firm. I did this by putting it in a bowl of water and microwaving for about 1 minute. It works just fine.
- Heat the oil in a skillet over medium heat and saute the chicken, green onions and garlic until the chicken is cooked thoroughly (not pink and no juices).
- Stir the hoisin sauce, chile paste and soy sauce into the skillet. Season everything with ginger, red pepper, salt and black pepper. Add the chicken stock and simmer for 2 minutes. Finally, add the broccoli and mix it around into the sauce mixture. Serve over rice and you're DONE!


I really liked this dish. It was so flavor and the chicken was not dull at all. The seasons really coated everything well and I liked how the broccoli added a bit of a crunch to the dish. I especially loved all the chile I added to the dish which made it so spicy and tasty. It's a little like having Panda Express in your own kitchen. I will definitely make this again!

Wednesday, July 28, 2010

How many soups? I've lost track!

Mmm, I love soup! I know it's summer so why do I continue to make soup? First, it's because the weather makes me think I'm in the middle of October/sometime borderline winter. Secondly, it's because I'm still trying to reach my goal of 100 soups by the end of this year (December is only a few months away). So far, I believe I've made about 20 soups... This is based on my terrible memory of such things. While some of these recipes have been blogged, some are still in the process of being blogged/made. Although there are a bazillion recipes online that I could be following, there are many things to consider:

1. Are the ingredients within my budget?
2. Is it healthy?
3. Is it worth the time?

While I ponder such questions when looking at a recipe, I've been waiting to find a really great soup book that will answer all the above with YES! Why just one book? Because it will be an easy one stop shop. Also, I'm trying to challenge myself like Julie Powell did with Julia Childs' "Mastering the Art of French Cooking" and cook every single recipe in one book. I think I've found the BOOK that will allow me to cook everything in it! Well I didn't find it but my awesome friend Ben did :). He gave me this


50 vegetarian soup recipes that all sound so scrumptious!!! I can't wait to crack into it this weekend. THANKS Ben!!! Get ready for some more soup recipes to come up soon :)

Tuesday, July 20, 2010

Brand new kitchen item - a tart pan!


With such a small kitchen, I try not to buy anything I don't usually need. I have only two spoons, three forks, one large mixing bowl, one spatula and a few plates/bowls/bake ware. I'd love to have a bazillion other gadgets but I'm content with what I have now as I have been able to make many recipes that I've wanted to. The only thing is that I've never had a tart pan so I wasn't able to make all these awesome tart recipes that I've read online. I decided that Daniel's dad's birthday was a great occasion to finally get one and make him something yummy and fun. I must also mention that while in Brazil, Daniel and I had an awesome slice of apple pie and it got me thinking about baking all kinds of apple-y sweets like pie and tarts since I've never done it before. Seriously, I didn't stop thinking about making a pie from the moment we took a bite out of that slice (it's a weird thing I have about certain recipes; I become a bit obsessed). I came home and bought a tart pan right away.

I found a recipe on Smitten Kitchen by Alice Waters for an Apple Tart and tried my hand at it.

Dough:
1 cup unbleached all-purpose flour
1/2 teaspoon sugar
1/8 teaspoon salt
6 tablespoons (3/4 stick) unsalted butter, just softened, cut in 1/2-inch pieces
3 1/2 tablespoons chilled water

Filling:
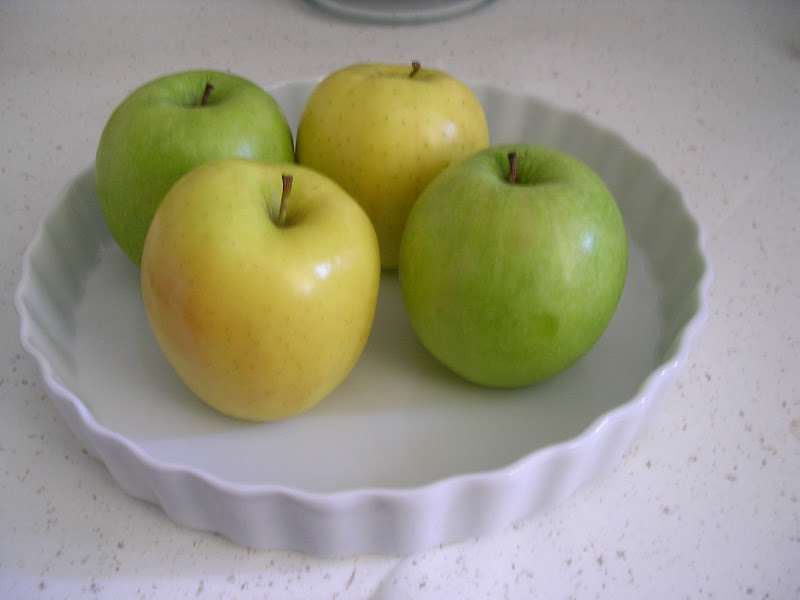
2 pounds apples (Golden Delicious or another tart kind), peeled, cored (save peels and cores), and sliced (I used Golden Delicious and Granny Smith Apples)
2 tablespoons unsalted butter, melted
5 tablespoons sugar

Glaze:
1/2 cup sugar (I used about 1/4 cup of sugar so it made my glaze really water but still enough to make the tart sweet)

Directions:

MIX flour, sugar, and salt in a large bowl; add 2 tablespoons of the butter. Blend with a mixer until dough resembles coarse cornmeal. Add remaining butter; mix until biggest pieces look like large peas. (Mine did not look anything like peas... but it still turned out just fine).

DRIBBLE in water, stir, then dribble in more, until dough just holds together. Toss with hands, letting it fall through fingers (mine did not fall through my fingers but felt just right), until it’s ropy with some dry patches. If dry patches predominate, add another tablespoon water. Keep tossing until you can roll dough into a ball. Flatten into a 4-inch-thick disk; refrigerate. After at least 30 minutes, remove; let soften so it’s malleable but still cold. Smooth cracks at edges. On a lightly floured surface, roll into a 14-inch circle about 1/8 inch thick. Dust excess flour from both sides with a dry pastry brush (or sprinkle it evenly with your hands - no fancy tools needed ;))

PLACE dough in a lightly greased 9-inch round tart pan. Heat oven to 400 degrees F.

OVERLAP apples on dough up to the sides of the tart pan. Continue inward until you reach the center. Fold any dough hanging over pan back onto itself; crimp edges at 1-inch intervals. (The funny thing is that I forgot to look at the pictures on Smitten Kitchen so my apple slices were huge! But it still tasted good).

BRUSH melted butter over apples and onto dough edge. Sprinkle 2 tablespoons sugar over dough edge and the other 3 tablespoons over apples.

BAKE in center of oven until apples are soft, with browned edges, and crust has caramelized to a dark golden brown (about 45 minutes), making sure to rotate tart every 15 minutes.


MAKE glaze: Put reserved peels and cores in a large saucepan, along with sugar. Pour in just enough water to cover; simmer for 25 minutes. Strain syrup through cheesecloth.

REMOVE tart from oven and let cool at least 15 minutes.

BRUSH glaze over tart, slice, and serve.

###

What did it taste like?!

Honestly, I have no idea. I didn't get a chance to try it since it was headed up to Irvine with Daniel for his dad's birthday. I took the opportunity to stay at home and rest since I was going through withdrawals from my vacation! But according to Daniel, it was really good! The dough was perfect (my first dough ever from scratch) and the apples had a nice little sweetness to it that wasn't overwhelming to his taste buds. He usually doesn't like anything too sweet (neither do I) so I knew that it must have been the right amount of sugar. I can't wait to use my tart pan again soon!


Monday, July 19, 2010

I'm back in the States and back in my kitchen!

I'm back from Brazil! The people, the culture, and the music made it such an amazing place to explore. While I'm a usual foodie when I travel to new places, this country was not one place that made me grab my camera the moment the plate was set in front of me. Not saying that they were all bad, they just weren't unique enough to capture on the lens. There were the occasional dishes that caught my eye like pastries, meat dishes and traditional dishes like fejoida but nothing too exciting. The three daily meals consist of the following:

Breakfast (Cafe de mana)
- Espresso - the strongest you can ever have.
- Fresh fruits
- Carbs - sweet to savory pastries like pao de queso (cheese bread), pastel de frango (deep fried chicken bake), pastel de carne (beef bake) and other types of empenadas.

Lunch
- Fresh juice (just ice and fruit blended into one sweet concoction)
- Um salgado favor - more empenadas
- Plato de carne y frijoles y arroz (plate of beef, beans and rice) with enough salt you will need for the rest of the year.

Dinner
- This could range depending on the restaurant you go to. Their dishes feature a lot of massa (pasta), pizza, seafood, beef, chicken and pork.

While in Rio de Janeiro Brazil, I stayed in an apartment and tried to cook whenever possible since I was eating out almost everyday for the past 2 weeks in Salvador Bahia. Daniel and I went to the grocery store and tried to purchase some things that were different and exotic to the local area. There were some great fruits like passion fruit (maracuja), pineapple (that's actually white), papaya ( I don't like this but Daniel does) and cherimoya (another thing I don't eat). While some of the fruits were appealing, the meats were something I tried to stay away from because they didn't look much like what we have here. They hung on racks with flies hovering over all of them and they look salted to death. I stuck to things that I knew I couldn't really get sick from like bread, deli meats (that's already cooked and prepared for me :)) and basic vegetables (carrots and corn; I didn't eat the corn though because it was the strangest texture ever). Since I didn't cook as much while I was there for almost a month, I was ready to get back into my kitchen and make some comfort foods for myself like soup :).

I went on a little bit of a soup frenzy, finding every kind of soup recipe there is to see what I could make over the next couple of weeks. I was really set on looking for a pumpkin soup recipe because I had one of the best pumpkin soups in Brazil that Daniel fell in love with so I wanted to try and recreate it. I didn't have much luck since it isn't pumpkin season and most of the recipes called for canned pumpkin. I decided that I wanted to make something more fresh and similar to pumpkin soup such as butternut squash. I found this great recipe from that was delish. If you like pureed soup, this one is for you. It's sweet and super easy to make. Enjoy!

Summer Squash Soup
Adapted from Gourmet, September 2006

Ingredients
3 tablespoons unsalted butter
1/2 a medium onion diced
Dash of salt
1 bag of butternut squash (already cut and prepared; 1 lb) from Trader Joes. Slice into smaller chunks.
1 carrot, peeled and thinly sliced
2 cups chicken broth

Directions
Melt butter in a medium to large pot over light to medium heat. Cook onions with the dash of salt in melted butter. Stir onions until it is softened (about 4 minutes).


Add squash, carrots and stock and bring it to a boil.


Reduce the heat, partially cover the pot with a lid and let it simmer for about 20 minutes (until the squash is mushy with a fork).

Remove the lid and soup from the heat and allow the soup to cool down for about 10 minutes.

Pour half of the soup mixture into a blender and blend it smooth. Pour the pureed soup into a serving bowl. Continue blending the remainder of the soup in the pot and pour it into the serving bowl. All done! Serve in smaller bowls for everyone. If the soup is too thick for you, thin it out with water or more broth.

I need a better camera. Seriously...
###

Here is another soup that I made the following day. It sounded so interesting to me because it mixed two items that I really like: chorizo and sweet potato (aka yam). It was unfortunate that my taste buds were not working that day because I came down with a cold. My taste buds disappeared but I was still able to smell the amazing chorizo cooking right in front me. It was kind of a sad day but I'm glad that others got to enjoy it. My sister liked it and Daniel just kept saying "Yum! Yum!". I asked him if this was a 'must do it again soup' and he said "Definitely!" That's going to be our new rating scale. Instead of doing a 4 star out of 5, we are going to say "Let's make that again" or "Let's not make that again". In other words, it's a pass or fail rather than a letter grading system ;).

Sweet Potato and Sausage Soup
Adapted from Bon Appetit, October 2007

Ingredients
1 and 1/2 tbsp of olive oil
7 ounces of chorizo sausage (about half of what usually comes in a package)
1 medium onion, chopped
1 large garlic clove (or more to your taste), minced
1 pound of red-skinned sweet potatoes ~ 1 potato, peeled, quartered into small pieces (about 1/4 inch)
1/2 pound of white-skinned potatoes ~ 2 small potatoes, peeled, quartered into small pieces (about 1/4 inch)
3 cups of low-salt chicken broth
Handful of fresh spinach
(In case you're wondering, all ingredients for this soup cost less $8.00 total!)

Directions
Heat a tablespoon of oil in a medium to large pot over medium heat. Add the chorizo and wait until it fully cooks through (about 7 minutes). I kind of mashed up the chorizo in the pot with my spatula as it was cooking so that it separated into 1/4 inch chunks.


Transfer the sausage to a separate plate and keep the pot going on the stove. Add the onions, garlic and cook them until they are translucent. Make sure to stir often as it may stick to the oil that is left behind by the chorizo.

Add all potatoes (red and white) and cook until it starts to soften. Make sure to stir often.

Add broth and allow the mixture to come to a boil. As it boils, use a spatula to scrape the bottom of the pot to get the chorizo bits, garlic and onions from the bottom to move around the pot.

Reduce the heat to medium-low, cover and simmer until the potatoes are soft (about 20 minutes). Stir the soup occasionally to prevent anything from sitting in one place too long.

Use a potato masher to mash some of the potatoes in the pot (I just used my fork and mashed some chunks against the side of the pot).

Add the chorizo to the soup. Stir in the spinach and simmer just until it starts to wilt (about 3 minutes). Season the soup with salt and pepper. Divide the soup into smaller boils and enjoy.


Wednesday, June 2, 2010

Belated Mother's Day Posting


Where did the month of May go? The last time I blogged was on Cinco de Mayo... getting to my goal of 100 soups this year might almost be impossible but I'm going to be optimistic and say that I can reach my goal of 50 :). This is definitely a belated Mother's Day posting as I was not able to post the cake the that I made for my grandma and my mom. I decided that since my mom doesn't like tangible gifts like jewelry, shirts that say "I love mom" or "World's Best Mom", or picture frames with my sisters and me in (she has tons already), a cake would be a nice little gift. We can share it with the family and sit around the dining room table enjoying our family time while feasting on dessert. I got this recipe from Joy the Baker and was really excited about it because 1) it is a vegan cake and 2) it uses avocados :). I love avocados but in a cake, not so much. It is much better when it is in guacamole. This was an interesting recipe and one that I just had to put to the test. It got many great reviews for tasting almost like a flour-less chocolate cake (not one of my favorite desserts) so I just had to try it. I had everything I needed at home so I took a crack at it.


Courtesy of Joy the Baker

For the cake:

3 cups all-purpose flour

6 Tablespoons unsweetened cocoa powder

1/2 teaspoon salt

2 teaspoons baking powder

2 teaspoons baking soda

2 cups granulated sugar

1/4 cup vegetable oil

1/2 cup soft avocado, well mashed, about 1 medium avocado

2 cups water

2 Tablespoons white vinegar (I used juice of a lime)

2 teaspoons vanilla extract

Baking the cake:

Preheat oven to 350 degrees F. Grease and flour two 8 or 9-inch rounds. Set aside.

Sift together all of the dry ingredients except the sugar (add this after you mix the wet ingredients together)

Mix all the wet ingredients together in a bowl, including the super mashed avocado.

Add sugar into the wet mix and stir.

Mix the wet with the dry all at once, and beat with a whisk (by hand) until smooth.

Pour batter into a greased cake tins. Bake the cake for 30 to 40 minutes (until a toothpick inserted comes out clean).

Let the cakes cool for 15 minutes, then turn out onto cooling racks to cool completely before frosting with avocado buttercream.

Avocado Buttercream Frosting from Alton Brown *I would recommend only making half of this recipe so that you can taste the frosting. Many have said that they don't like it because it is too sweet. I actually reduced the amount of sugar by almost 1/4-1/2 cup so that it wasn't too sweet.

For the frosting:

8 ounces of avocado meat, about 2 small to medium, very ripe avocados

2 teaspoons lemon juice

1 pound powdered sugar, sifted

1/2 teaspoon vanilla extract

Peel and pit the soft avocados. Avoid any brown spots on the avocado.

Whisk the avocado meat with the lemon juice until it becomes smooth. Joy recommends a stand alone mixer but I have a hand mixer. It works just as well.

Add the powdered sugar a little at a time and beat. Add vanilla extract until combined. Store it in airtight container in the refrigerator if you are not using it right away. Keep in mind that it might brown due to the avocados exposure to oxygen. Mine turned a ghastly brown color.

***

I think the cake was edible but it is not something I am willing to try again. It was a little too dense for me and as I said before, flour-less chocolate cake is not my style. Even a cup of milk didn't help me get through this cake but I hope you get a chance to try it and like it :).

Updates on my plants:

Currently I'm working on growing some herbs, a bell pepper plant, avocado tree and pineapple plant. So far, only the herbs (I should really say herb since only one seed sprouted) and the bell pepper plant has succeeded (it's grown 3 inches!). Sadly, I have to wait many months to a year before I see any progress in the pineapple plant and ten years before I see the fruits of the avocado tree. I'm glad that I started the process early though so that in the future, it'll be a tree where I can hang my hammock. :)