Showing posts with label Baking. Show all posts

Sunday, August 14, 2011

Summer fruit lovin'

Last summer, I went on quite a strawberry kick after we went strawberry picking. This year is no different. Instead of picking them from the patch, I bought the four pound box at Costco. Note to self, one should never buy food/fruits at Costco for a household of two. With this box, I made a few strawberry banana smoothies, ate a ton of them as a lunch snack and kept thinking of ways to incorporate them into a baked good. I was planning on making jam but decided that it would be of great use on a fruit tart. I was researching the variety of recipes there are on the web and came across Paula Deen's recipe. While I was ready to make her recipe, I found that I didn't have enough time or the energy to gather some of the items she requested (about ten sticks of butter and a can of limeade). Instead, I went my own way on this recipe. That is quite the leap for me as I don't usually like to stray from recipes. I get anxiety as I fear that it might come as a huge goop of something people don't want to eat. That would be a shame to toss away something that could have been edible. On to my version of the fruit tart (with bits and pieces of ideas from other sites):

Ingredients:
- Fresh fruits (kiwi, strawberries, nectarines, plums, blueberries and more)
- Apricot jam
- Frozen pie crust
- Cream cheese
- Sugar

Directions:
1. Prepare the pie crust as directed on the box.
2. Allow the pie crust to cool after baking. As it cools off, cut round fruits into slices and place them on the side.
3. Take about 1/2 cup of cream cheese and mix in 3 tbsp of sugar. Keep stirring until the sugar is mixed in really well.
4. Spread the cream cheese mixture on the pie crust.
5. Arrange the fruit on top of the cream cheese mixture as you like it.
6. Take about 1/4 cup of apricot jam and half 1/4 cup of water and simmer it on medium low until the jam starts to become liquidy. If the jam is still separated from the water, take a spoon and whisk the water and jam together until it combines. Once it's well mixed, take a brush and brush the jam mixture on top over the fruit. Voila! Enjoy :)

Other accomplishments this weekend:

I made a birthday banner that I can use year round for everybody's birthday. I had a blast going to Jo-Anns to pick out the fabric though it was quite a difficult choice to make.


Being put to use outside at the bbq birthday party we hosted!

I went to a really great flea market in town to see some furniture that could country-fy my home to change it from the modern home it is today. I was so glad that I didn't carry more than 20 dollars in cash or else I would have gone home with more than I could handle. What I had in mind was a wagon for my garden, a pitcher to hold my fresh cut flowers and new vintage type furniture. I went home with a great wooden red wagon (to be pictured later), a pitcher and a picnic suitcase. All of these great finds added up to $12! Woo hoo!

Pitcher in use :D with my to be made table runner underneath it.

Here's to more crafty weekends to come!


Tuesday, August 31, 2010

Farm Fresh - From Berries to Muffins

Two weeks ago, I had the opportunity to visit my friend's cute little farm out in Watsonville. Daniel and I got to ride a tractor, feed chickens, collect fresh eggs and pick blackberries off a bush! It's not your average sized bush either, it was a giant with many many berries ready for the picking. I had all these ideas running through my head - what will I make with all of these berries? We picked about 2 pounds worth and I finally had the chance to make some things - creme brulee and muffins. Yum yum :). I don't know what the berries tasted like before I put them into the mix but I'll say they are excellent ingredient for your every day dessert.

I also want to add that I now understand why blackberries (or any kind of berry) are so expensive in the market. I was poked by thorns left and right while picking these berries; there definitely isn't a way to mechanize this method of picking berries because it would only ruin the ripe berries. I'm guessing that the berry industry charges high rates because their workers have to work hard to pick all of these. The next time you have a berry, think about it! Also think about the idea of farm to table meals. I went to this awesome restaurant in Napa (Long Meadow Ranch) where they bring all of their home grown ingredients directly to your table in a magnificent dish. I felt like I was doing the same thing by picking these berries and bringing them directly home to eat. Oh how great it feels to know where your food is coming from!

Here are some fun pictures from the berry picking extravaganza:

Oh look how they hang

Colorful pink to brown colored eggs Yee-haw it's tractor riding!

My friend made a delicious Japanese donburi dish with eggs, mushrooms and onions over chicken katsu with the fresh eggs. I'm glad we didn't have to worry about consuming these eggs. All they eat are some corn seeds and fruit and they have plenty of room to move around and be clean and safe.

So on to the recipe. Thanks to Joy the Baker for posting a great recipe for muffins.

Blackberry Muffins - Yields about 8 small sized muffins

Ingredients:
- 3 Tbsp of unsalted butter
- 1/6 cup of milk - I used 1% low fat milk
- 1 large egg
- 1/2 tspn of vanilla extract
- 3/4 cup of all-purpose flour
- 3/8 cup of sugar ( I mixed half white and brown sugar) - The measurements are weird because I cut everything in half but for you to imagine, it's half of 3/4 of a cup.
- 1/2 tspn of baking powder
- Pinch of salt
- 3/4 cup of berries - black, blue or red. Your choice.

Directions:
- Place your oven rack in the upper third part of your oven and preheat it to 375 degrees.
- Prepare your muffin pan with liners or spray it with canola oil.
- Melt the butter in the microwave for about 20-30 seconds. Make sure that it's not too hot and then start whisking in the milk, egg and vanilla until it is a milky smooth mixture.
- In another bowl, whisk together flour, sugar, baking powder and salt. Slowly combine the wet mixture into the dry ingredients. Once combined, start folding in the berries.
- Divide the batter evenly among the muffin cups ~ 8. Bake for about 20 minutes on the upper rack.
- After they turn golden brown, take out the muffins and let them cool for 15 minutes. After it has cooled down, remove the muffins from the pan. They should easily come out if you sprayed enough oil.
- Enjoy! They're so great warm :)


I really enjoyed this recipe because it combined something tangy with something bread-y. It's not that sweet and it's perfect as a very light snack. It's also beautiful in color (look at that purplish color!) I can't wait to enjoy this with some milk.

Monday, August 30, 2010

Mmm matcha!

This post is dedicated to green tea - one of the many loves of my life. I love to have tea time in the morning, late afternoon and evenings but this time it's in dessert! I have a list of desserts with tea as an ingredient (like chai tea cupcakes) but this isn't about that. It's about matcha green tea mochi baby cakes with red bean paste (say that ten times fast!). I wanted to make something unique/special because it was Daniel's moms birthday and I wanted him to take home a nice little surprise for his family. At first I didn't think it would be possible to make something with matcha because I wasn't sure where I would get the powder. I read on Happy Home Baking (a great blogger who focuses on some Asian dessert specialties) that you can get the powder on Amazon but there wasn't enough time for it be delivered. If you live next to a Mitsuwa or another Japanese market, you can easily find it there in the tea aisle. It's about $7.00 for a small can that is 1.5 ounces. I can't believe it's that pricey for a small ounce of it but it's definitely worth it. It smells so great when you pop open the can - so fresh! Plus you can get quite a few tablespoons out of a can.

Ok so on to the recipe. Since I only bought matcha and red bean paste (also at the Japanese market), I thought I could make matcha pound cake but I didn't actually have a bread pan. I had to think of something else using these two items as the main ingredients and found Kitchen Meditation (ommm) which came to the rescue. At first I was a little hesitant because she mentioned the ingredient Mochiko which I've used to make mochi before. It was a sticky messy situation and I didn't want to touch it ever again but somehow it made its way back into my life. With only two hours before I had to get going, I decided this recipe would do and the final product did look pretty good. I have to say, the taste was also pretty good ;)

Ingredients for 12 mini (cup) cakes:
- 1 2/3 cup Mochiko
- 1/2 tsp salt
- 1 1/2 tsp baking powder
- 1/2 cup sugar
- 1 tbsp (or more) matcha
- 1/4 cup egg beaters
- 1/3 cup melted butter
- 1 cup soy milk (she used Almond)
- 1 cup Anko (red bean paste) - I just eyeballed the amount I would put into each cake.

Directions:
- Preheat the oven at 350 degrees.
- Melt the butter in the microwave (approximately 30 seconds) then set aside for cooling. I learned that if you don't let the butter cool down and you mix it with the eggs, you create an unsettling scramble affect that is startling. Scary but fixable.
- In one large bowl, mix together the flour, salt, baking powder, matcha and sugar.
- When the butter has colled down, mix it together with the egg and milk in another bowl.
- Slowly stir the wet ingredients into the dry ingredients and mix until it becomes on giant green batch of sticky batter.
- Spray a muffin pan with cooking spray and spoon the batter into each cup at about 1/3 full.
- Scoop about 1 to 1/2 tsp of red bean paste into each cup in the middle of the batter.
- Top the remainder of the batter (about half a tablespoon full) on top of each cup. I shook the pan to make sure that the batter covered up the red bean paste and made each cup look smooth on top.
- Bake for about 25 minutes and as Daniel would say, "Ita daki mas!" which means "I'm ready to eat".

How were they?
I don't usually like the texture of mochi but when it's in a cake like form, it's a little more bearable. I like the subtle green tea taste and the sweet little surprise in the middle. This is an entirely new thing I tried and I must say, I enjoyed it. The cakes aren't soft nor crumbly when bitten but it's lightly chewy and softly dense. Weird way to describe it but it's just a weird kind of (cup)cake. I don't really want to call it a cupcake because it really just reminds me of a brownie bite. Small size without any frosting so I don't think it can really be categorized as a cupcake. But it is refreshing and different. Hope you try it sometime!


Thanks to my awesome sous chef Daniel for being the BEST photographer ever :) and my inspiration for writing in my blog.

Tuesday, July 20, 2010

Brand new kitchen item - a tart pan!


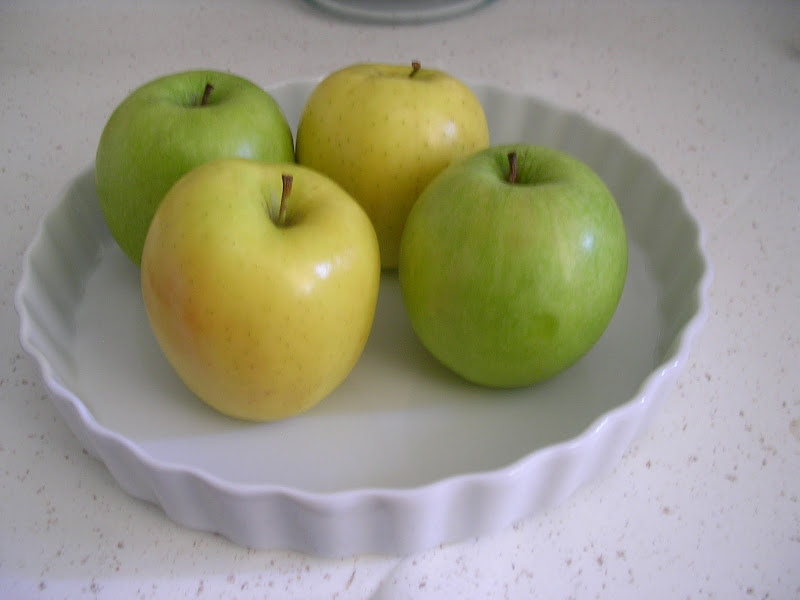
With such a small kitchen, I try not to buy anything I don't usually need. I have only two spoons, three forks, one large mixing bowl, one spatula and a few plates/bowls/bake ware. I'd love to have a bazillion other gadgets but I'm content with what I have now as I have been able to make many recipes that I've wanted to. The only thing is that I've never had a tart pan so I wasn't able to make all these awesome tart recipes that I've read online. I decided that Daniel's dad's birthday was a great occasion to finally get one and make him something yummy and fun. I must also mention that while in Brazil, Daniel and I had an awesome slice of apple pie and it got me thinking about baking all kinds of apple-y sweets like pie and tarts since I've never done it before. Seriously, I didn't stop thinking about making a pie from the moment we took a bite out of that slice (it's a weird thing I have about certain recipes; I become a bit obsessed). I came home and bought a tart pan right away.

I found a recipe on Smitten Kitchen by Alice Waters for an Apple Tart and tried my hand at it.

Dough:
1 cup unbleached all-purpose flour
1/2 teaspoon sugar
1/8 teaspoon salt
6 tablespoons (3/4 stick) unsalted butter, just softened, cut in 1/2-inch pieces
3 1/2 tablespoons chilled water

Filling:
2 pounds apples (Golden Delicious or another tart kind), peeled, cored (save peels and cores), and sliced (I used Golden Delicious and Granny Smith Apples)
2 tablespoons unsalted butter, melted
5 tablespoons sugar

Glaze:
1/2 cup sugar (I used about 1/4 cup of sugar so it made my glaze really water but still enough to make the tart sweet)

Directions:

MIX flour, sugar, and salt in a large bowl; add 2 tablespoons of the butter. Blend with a mixer until dough resembles coarse cornmeal. Add remaining butter; mix until biggest pieces look like large peas. (Mine did not look anything like peas... but it still turned out just fine).

DRIBBLE in water, stir, then dribble in more, until dough just holds together. Toss with hands, letting it fall through fingers (mine did not fall through my fingers but felt just right), until it’s ropy with some dry patches. If dry patches predominate, add another tablespoon water. Keep tossing until you can roll dough into a ball. Flatten into a 4-inch-thick disk; refrigerate. After at least 30 minutes, remove; let soften so it’s malleable but still cold. Smooth cracks at edges. On a lightly floured surface, roll into a 14-inch circle about 1/8 inch thick. Dust excess flour from both sides with a dry pastry brush (or sprinkle it evenly with your hands - no fancy tools needed ;))

PLACE dough in a lightly greased 9-inch round tart pan. Heat oven to 400 degrees F.

OVERLAP apples on dough up to the sides of the tart pan. Continue inward until you reach the center. Fold any dough hanging over pan back onto itself; crimp edges at 1-inch intervals. (The funny thing is that I forgot to look at the pictures on Smitten Kitchen so my apple slices were huge! But it still tasted good).

BRUSH melted butter over apples and onto dough edge. Sprinkle 2 tablespoons sugar over dough edge and the other 3 tablespoons over apples.

BAKE in center of oven until apples are soft, with browned edges, and crust has caramelized to a dark golden brown (about 45 minutes), making sure to rotate tart every 15 minutes.


MAKE glaze: Put reserved peels and cores in a large saucepan, along with sugar. Pour in just enough water to cover; simmer for 25 minutes. Strain syrup through cheesecloth.

REMOVE tart from oven and let cool at least 15 minutes.

BRUSH glaze over tart, slice, and serve.

###

What did it taste like?!

Honestly, I have no idea. I didn't get a chance to try it since it was headed up to Irvine with Daniel for his dad's birthday. I took the opportunity to stay at home and rest since I was going through withdrawals from my vacation! But according to Daniel, it was really good! The dough was perfect (my first dough ever from scratch) and the apples had a nice little sweetness to it that wasn't overwhelming to his taste buds. He usually doesn't like anything too sweet (neither do I) so I knew that it must have been the right amount of sugar. I can't wait to use my tart pan again soon!


Wednesday, June 2, 2010

Belated Mother's Day Posting


Where did the month of May go? The last time I blogged was on Cinco de Mayo... getting to my goal of 100 soups this year might almost be impossible but I'm going to be optimistic and say that I can reach my goal of 50 :). This is definitely a belated Mother's Day posting as I was not able to post the cake the that I made for my grandma and my mom. I decided that since my mom doesn't like tangible gifts like jewelry, shirts that say "I love mom" or "World's Best Mom", or picture frames with my sisters and me in (she has tons already), a cake would be a nice little gift. We can share it with the family and sit around the dining room table enjoying our family time while feasting on dessert. I got this recipe from Joy the Baker and was really excited about it because 1) it is a vegan cake and 2) it uses avocados :). I love avocados but in a cake, not so much. It is much better when it is in guacamole. This was an interesting recipe and one that I just had to put to the test. It got many great reviews for tasting almost like a flour-less chocolate cake (not one of my favorite desserts) so I just had to try it. I had everything I needed at home so I took a crack at it.


Courtesy of Joy the Baker

For the cake:

3 cups all-purpose flour

6 Tablespoons unsweetened cocoa powder

1/2 teaspoon salt

2 teaspoons baking powder

2 teaspoons baking soda

2 cups granulated sugar

1/4 cup vegetable oil

1/2 cup soft avocado, well mashed, about 1 medium avocado

2 cups water

2 Tablespoons white vinegar (I used juice of a lime)

2 teaspoons vanilla extract

Baking the cake:

Preheat oven to 350 degrees F. Grease and flour two 8 or 9-inch rounds. Set aside.

Sift together all of the dry ingredients except the sugar (add this after you mix the wet ingredients together)

Mix all the wet ingredients together in a bowl, including the super mashed avocado.

Add sugar into the wet mix and stir.

Mix the wet with the dry all at once, and beat with a whisk (by hand) until smooth.

Pour batter into a greased cake tins. Bake the cake for 30 to 40 minutes (until a toothpick inserted comes out clean).

Let the cakes cool for 15 minutes, then turn out onto cooling racks to cool completely before frosting with avocado buttercream.

Avocado Buttercream Frosting from Alton Brown *I would recommend only making half of this recipe so that you can taste the frosting. Many have said that they don't like it because it is too sweet. I actually reduced the amount of sugar by almost 1/4-1/2 cup so that it wasn't too sweet.

For the frosting:

8 ounces of avocado meat, about 2 small to medium, very ripe avocados

2 teaspoons lemon juice

1 pound powdered sugar, sifted

1/2 teaspoon vanilla extract

Peel and pit the soft avocados. Avoid any brown spots on the avocado.

Whisk the avocado meat with the lemon juice until it becomes smooth. Joy recommends a stand alone mixer but I have a hand mixer. It works just as well.

Add the powdered sugar a little at a time and beat. Add vanilla extract until combined. Store it in airtight container in the refrigerator if you are not using it right away. Keep in mind that it might brown due to the avocados exposure to oxygen. Mine turned a ghastly brown color.

***

I think the cake was edible but it is not something I am willing to try again. It was a little too dense for me and as I said before, flour-less chocolate cake is not my style. Even a cup of milk didn't help me get through this cake but I hope you get a chance to try it and like it :).

Updates on my plants:

Currently I'm working on growing some herbs, a bell pepper plant, avocado tree and pineapple plant. So far, only the herbs (I should really say herb since only one seed sprouted) and the bell pepper plant has succeeded (it's grown 3 inches!). Sadly, I have to wait many months to a year before I see any progress in the pineapple plant and ten years before I see the fruits of the avocado tree. I'm glad that I started the process early though so that in the future, it'll be a tree where I can hang my hammock. :)

Thursday, April 8, 2010

Strawberry Season is Here!


Spring time is here so that means plenty of strawberries! This last weekend I went with my boyfriend to Carlsbad where there is a large field of strawberries where you can pay and pick. It was such a beautiful sight! The sweetest thing is when you see a little child go and pick a strawberry and quickly put it in their mouth; it's also cute when you see the traces of strawberry all over their chubby cheeks :). It was such a nice day for everyone to be outside in the sun picking one of the best fruits (or flowers if you want to get technical) of the season. We bought a small bucket that would usually fit about 15-20 large strawberries. It really wasn't big at all (think medium popcorn bucket). Of course we couldn't go home with just 15 strawberries for $8.00, that's just ridiculous. So we copied other people's techniques which meant pulling strawberries with the entire vine and hanging it on the outside of the bucket. I'll definitely post a picture of that soon. With this technique, we were able to get almost 4 pounds of strawberries!!! Now that I look back, that was one too many for my own good. I can't even look at them in the grocery store anymore. So what to do with all these strawberries? Immediately I began to think about what I could bake with these strawberries. I am a big fan of strawberry rhubarb pie so I thought about making pie but that just required more time than I really had. I decided I'd made the same kind of pie filling but a different topping - a crispy crumble topping!

45 minutes later, I was enjoying a baked strawberry rhubarb crumble.


Here is a great filling recipe from Smitten Kitchen:

For the filling:
1 1/2 cups rhubarb, chopped into 1-inch pieces (it looks like a pink celery stalk)
1 quart strawberries plus a few extras, hulled, quartered (this means about 4 cups)
Juice of one lemon
1/2 cup sugar
3 to 4 tablespoons cornstarch
Pinch of salt

After making this filling, I spooned the mixture into small ramkins instead of large baking dish such as the one on Smitten Kitchen's website.

I went on to use another recipe from All You magazine for the crumble on top.

1/2 cup sugar
1 teaspoon cinnamon
2 tablespoons unsalted butter, melted and cooled
2 tablespoons canola oil
3/4 cup all-purpose flour

You might need to make more of the crumble to cover all of the strawberry rhubarb filling. I ended up cutting the strawberry rhubarb recipe in half and used only half of the crumble recipe too. I was a little short on crumble.

Pop the ramkins into the oven at 350 degrees for about 12-15 minutes and voila!

I really liked the tartness of the rhubarb and sweetness of the strawberries combined. I hope you enjoy it too!

###

Another recipe I tried that evening after strawberry picking was strawberry jam. I wanted to avoid pectin when making the jam but you really need it. Without it, your jam won't solidify and instead become a runny mess. I'm going to use it top pancakes now instead of using it on toast.

###

This is quite the blog post this week. My friend came to visit me last night for a late night bake session and it was so much fun. I got to try a recipe that she used from Martha Stewart called Lime Meltaways. If you enjoy citrus flavors and shortbread cookies, this is for you.

Ingredients (to make 10 dozen):
12 tablespoons (1 1/2 sticks) unsalted butter, room temperature
1 cup confectioners' sugar (split into 1/3 and 2/3)
Grated zest of 2 limes
2 tablespoons freshly squeezed lime juice
1 tablespoon pure vanilla extract
1 3/4 cups plus 2 tablespoons all-purpose flour
2 tablespoons cornstarch
1/4 teaspoon salt

Directions

With an electric mixer, cream butter and 1/3 cup sugar until fluffy. Add lime zest, juice, and vanilla; beat until fluffy.
In a medium bowl, whisk together flour, cornstarch, and salt. Add to butter mixture, and beat on low speed until combined.
With parchment paper, roll the dough into two 1 1/4-inch-diameter logs. Chill at least 1 hour.
Heat oven to 350 degrees. Line two baking sheets with parchment.
Remove parchment from logs; slice dough into 1/8-inch-thick rounds. Place rounds on baking sheets, spaced 1 inch apart.
Bake cookies until barely golden, about 15 minutes. Transfer cookies to a wire rack to cool slightly, 8 to 10 minutes. While still warm, place cookies in the 2/3 cup sugar-filled bag and toss to coat. Bake or freeze remaining dough. Store them in an airtight container.

Refreshing, cool and light. Three words that describe what my taste buds were surely feeling :).


PS If you like lemons, you can substitute the lime juice/zest with that of a lemon.
PSS I need better images...

Monday, March 22, 2010

A Weekend of Baking

Success! I managed to bake two types of desserts this weekend so I can update the blog and have some savory treats before I embark on another trip across the US. My awesome friend Fabianne and I made lemon poppy seed pound cake with wild blueberries on Saturday. If you like the texture of banana bread, this would be a great recipe for you. I've never made anything with poppy seeds before so I was even more excited! I'm a big follower of Joythebaker.com and have been browsing her site for months now and finally put her recipes to good use. If you ever need an idea for dessert, browse her website. There are more than 100 to choose from. :)


Recipe from Joy the Baker with some edits by me.

2 cups all-purpose flour
1 teaspoon baking powder
1/4 teaspoon salt
2 sticks (8 ounces) unsalted butter, at room temperature
1 cup sugar
4 large eggs at room temperature
1 teaspoon vanilla extract
1 tablespoon poppy seeds (available at World Market)
1 tablespoon lemon zest
1/3 cup frozen wild blueberries

Center a rack in the oven and preheat the oven to 325 degrees F. Butter a 9-x-5-inch loaf pan. Put the pan on an insulated backing sheet, or on two regular baking sheets stacked on top of the other.

Whisk together the flour, baking powder, salt, and poppy seeds.

Rub the lemon zest into the granulated sugar until sugar is slightly tinted yellow and is fragrant. (If you want a more lemony flavor, add some lemon juice or zest more lemon. I would recommend this as there is a very subtle lemon flavor and I love the flavor of lemon pound cake).

Working with a stand mixer (if you want to do it by hand, you can do that too. I did it and it came out just fine), preferably fit with a paddle attachment, or with a hand mixer in a large bowl, beat the butter and sugar mixture on high speed until pale and fluffy, a full 5 minutes. Scrape down the bowl and beater and reduce the mixer speed to medium. Add the eggs one at a time, beating for 1 to 2 minutes after each addition. As you’re working, scrape down the bowl and beater often. Mix in the vanilla extract. Reduce the mixer speed to low and add the flour and poppyseeds, mixing only until incorporated. Take the bowl off the stand mixer, and use a spoon to fold in the frozen blueberries. Scrape the batter into the buttered pan and smooth the top.

Put the cake in the oven to bake, and check on it after about 45 minutes. It it’s browning too quickly, cover it loosely with a foil tent. Bake the cake for about 70 to 75 minutes. The cake is properly baked when a thin knife inserted deep into the center comes out clean

Remove cake from the oven, transfer the pan to a rack and let it rest for 30 minutes.

Run a blunt knife between the cake and the sides of the pan and turn the cake out, then turn it right side up on the rack and cool to room temperature. (I just left the cake in because I was lazy)

Wrapped well, the cake cake keep for 5-7 days at room temperature.

###

If you check out her website, you'll notice that she put some lemon curd on the slices. I think this would add some more lemon flavor to the pound cake as it has a very subtle lemon flavor (add more zest!). I didn't have any lemon curd and thought that the pound cake was good enough as is with some tea ;). I love tea and this was the perfect combination with black tea.

The second dish I made was for my office colleagues. Peanut Butter Blondies. Yeah.. drool. I'm not really into super sweet dishes but I knew my office mates would like it. I would have this dish with a cup of coffee (without sugar) because it will balance out. I would also recommend using dark chocolate to top off the blondies instead of milk chocolate. I think this is only because my taste buds have become a little biased and they enjoy the dark taste of dark chocolate. I can handle about 60% of cacao now (but don't do 75% because that's NO LONGER chocolate!).


*Excuse my photo. I took it with my camera phone.

Peanut Butter Blondies with Milk Chocolate Frosting by Joy the Baker

10 Tablespoons unsalted butter cut into 5 cubes
2 cups dark brown sugar (I did half dark brown and light brown - still tastes the same :))
1 cup smooth and natural peanut butter (Henry's and Trader Joe's has great natural PB)
2 eggs
2 teaspoons vanilla extract
1/2 teaspoon salt
2 cups flour
1 teaspoon baking powder

Preheat oven to 325 degrees F. Grease a 9×13-inch pan, line with parchment paper if you have it on hand, then grease the parchment paper. If you don’t have parchment paper, these blondies will be just fine.

In a medium saucepan over medium heat, melt butter and sugar together until the butter is just melted. Remove from the burner and allow to cool for 5 minutes, then add the peanut butter. Stir until incorporated. Allow to cool for 5 minutes more, then whisk in the eggs and vanilla extract. You want the sugar, butter and peanut butter mixture to be cool enough that the eggs won’t begin to cook when they’re added in.

Whisk together salt, flour and baking powder. Add dry ingredients all at once to the wet ingredients. Stir until just incorporated. Pour the thick batter into the prepared pan and smooth out. Bake for 20-25 minutes, or until a skewer inserted in the center of the blondies comes out clean. Remove from the oven and allow to cool to room temperature before frosting.

Milk Chocolate Frosting

6 Tablespoons unsalted butter, softened
3 Tablespoons unsweetened cocoa powder
1/4 teaspoon salt
1 1/2 – 2 cups powdered sugar
3 Tablespoons milk
3/4 cup milk chocolate chips, melted

In the bowl of a stand mixer, beat together the butter, cocoa powder and salt. Add 1/2 cup powdered sugar followed by 1 tablespoon milk. Beat well. Add another cup of powdered sugar, followed by 2 tablespoons of milk. Melt milk chocolate chips in the microwave or in a double boiler. Add melted and slightly cooked milk chocolate the frosting and beat to incorporate. *It will be very watery and not thick but I left it as it was without the additional half cup of powdered sugar to cut down on sugar. Also, the blondies are quite sweet already so I would suggest just pouring the mixture as-is onto the blondies and refrigerate to harden*. Spread evenly over peanut butter blondies.

If you want more sugar and thickness: Add the final 1/2 cup of powdered sugar.

I don't know if I'll make a dish like this again just because of the amount of sweetness and butter it has. I would much rather prefer something cake like. I don't really like dense sweet treats because it just doesn't settle well with me and it's way too much SUGAR. I like fluffy things like cakey brownies. I think that will be my next mission :).